PDK Setup & Config - Part 2
With the prerequisites out of the way, we are ready to download the sdk.
Repository Setup
There are two ways to set up the repository:
- Cloning from git
- Downloading a zip
Cloning from git has the advantage of easier updates, but requires knowledge of git. This guide will explore both options.
Cloning from git
To clone the repository from git, use this link: https://github.com/localcc/PalworldModdingKit.
Using git clone run:
git clone https://github.com/localcc/PalworldModdingKit
Downloading a zip
If you're not using git, you can download the zip using the button below:
Download PDKAfter downloading the zip file, unpack it.
Checking
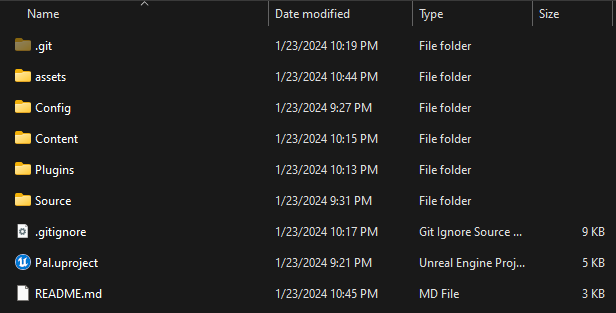
After downloading the repo, you should see the following file structure:
Wwise integration
Before continuing to open the sdk in unreal, we must integrate Wwise manually. This is because the Wwise version that the game uses, is not officially compatible with the engine version, so we have to manually copy it over.
- Open the directory you downloaded offline installation files for Wwise in ( Back at the end of Part1 ), you should see the following structure:
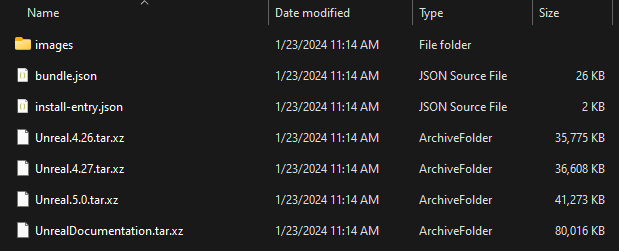
- Unpack the
Unreal.5.0.tar.xzarchive.
You might need to do it twice, first time you unpack it, you might get a .tar file, unpack that one too.
-
Copy over the unpacked
WwiseFolder ( ) into thePluginsfolder of the Palworld Modding Kit. -
Almost done with Wwise integration, now we just need to copy over the needed dlls.
-
Open the
Plugins\WwiseFolder ( ) inside the Palworld Modding Kit, and create aThirdPartyfolder there. -
Now go to the Folder ( ) where you installed the Wwise SDK
This is not the folder where you installed the integration files, but the folder where you installed the SDK
C:\Program Files (x86)\Audiokinetic\Wwise 2021.1.11.7933\SDK
Inside of this Folder ( ), select:
Win32_vc170x64_vc170include
-
Copy over the Folders ( ) listed above to the
ThirdPartyfolder you created earlier. -
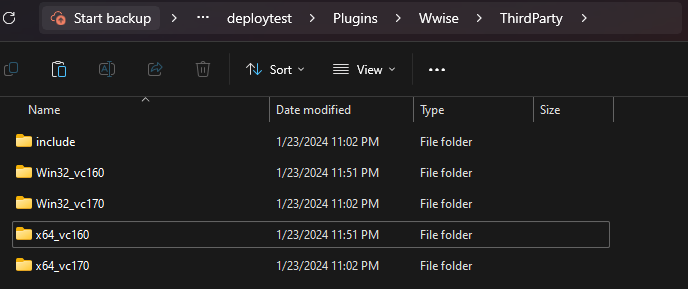
After copying over those folders, make sure to duplicate the
vc170folders asvc160also, so the structure will look as follows:
If you continue without the following change, you will have to click OK on a dialog box that says Wwise is not compatible with the current Unreal Engine version every time you load up the editor.
To fix this, navigate to Plugins\Wwise and open Wwise.uplugin with any text editor or ide.
Then change the entry "EngineVersion" : "5.0.0", to "EngineVersion" : "5.1",.
Finished
Yay! Now we are done with integrating wwise!
Changing build tools from VS 2019 to VS 2022
In Unreal Engine 5.1, by default, Visual Studio 2019 build tools will be used if they are installed.
The below changes should only be made if Visual Studio 2019 is installed alongside Visual Studio 2022.
If you don't see "Unreal Engine" in %APPDATA%
If you don't see "Unreal Engine" in %APPDATA% that means you haven't launched Unreal Engine before
Go to Epic Games Launcher -> Unreal Engine -> Library 0 > Click "Launch" on the Unreal Engine version that you've downloaded (5.1.x).
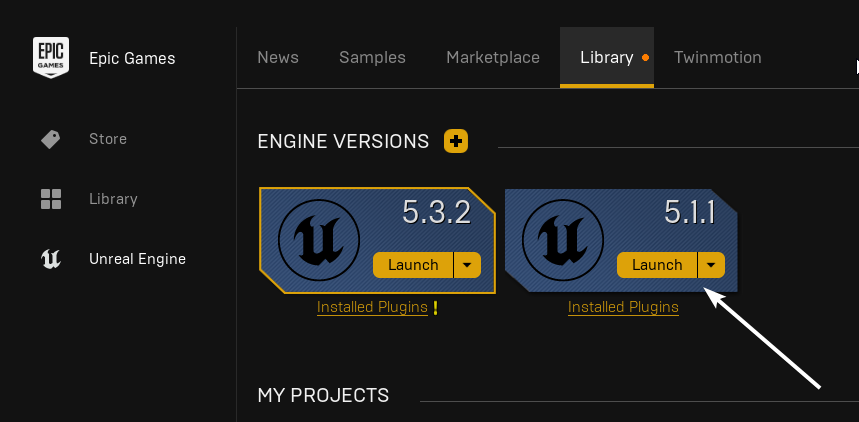
Let it load until you see the creation of a new project screen then close it and continue with the guide.
To change this, navigate to %APPDATA%\Unreal Engine\UnrealBuildTool and open BuildConfiguration.xml with your favorite XML editor.
<?xml version="1.0" encoding="utf-8" ?>
<Configuration xmlns="https://www.unrealengine.com/BuildConfiguration">
</Configuration>
<?xml version="1.0" encoding="utf-8" ?>
<Configuration xmlns="https://www.unrealengine.com/BuildConfiguration">
    <VCProjectFileGenerator>
        <Version>VisualStudio2022</Version>
    </VCProjectFileGenerator>
    <WindowsPlatform>
        <Compiler>VisualStudio2022</Compiler>
    </WindowsPlatform>
</Configuration>
Congratulations on making it through the configuration!