Packaging
The packaging format for Thunderstore is a simple zip file with a predetermined structure. This structure contains the files of your mod put into special direcetories, as well as some files with metadata about your mod.
Why Thunderstore?
This guide will be about Thunderstore and how to package and publish your mods there. You might ask why?
The answer is not too complicated, Thunderstore provides superior dependency management other existing mod managers, alongside that Thunderstore provides a better way of injecting ue4ss that doesn't break your game installs if there is a major version upgrade of ue4ss (e.g. the 2.5.2 -> 3.0 case).
There are also other benefits like mods not conflicting with each other because of their name, a great profile management system, easy sharing of mod profiles using a simple copyable code, etc.
But I don't like overwolf
Me neither, with Thunderstore we're in luck and an alternative client for it exists: r2modman, this is a standalone Thunderstore client which doesn't require overwolf and doesn't contain ads.
Structure
Here's a complete overview of the mod structure:
- ModArchive.zip
-
manifest.json- manifest describing your mod -
README.md- readme of your mod to be shown on the Thunderstore webpage -
icon.png- mod icon -
mod/- lua / dll mods directory -
enabled.txt- an empty file, required for your mod to get loaded -
scripts/- lua scripts -
main.lua- your lua script entrypoint
-
-
dll/- native c++ ue4ss mods -
main.dll- main c++ mod file
-
-
pak/- pak files -
ModName.pak- mod pak file
-
-
cfg/- mod config files -
author-mod-cfg.json- config file
-
-
The structure should be pretty self-explanatory, however this guide will go into more detail.
While developing your mods, you might've produced several or all of these types of files, here's a table describing their use and where they should be put:
| File Types | Destination dir | Description |
|---|---|---|
.lua | mod/scripts/ | Lua scripts |
.pak | pak/ | Mod pak files |
.dll | mod/dll/ | Native ue4ss c++ mods |
.json | cfg/ | Mod configuration files |
Manifest
Now that we understand the structure, let's explore the manifest file you need to create to make your mod recognizable by Thunderstore.
Structure of the manifest is a simple json like this:
{
    "name": "TestMod",
    "version_number": "1.1.0",
    "author": "You",
    "website_url": "https://github.com/thunderstore-io",
    "description": "This is a description for a mod. 250 characters max",
    "dependencies": [
        "Thunderstore-unreal_shimloader-1.0.2"
    ]
}
Everything here should be pretty self-explanatory. The dependencies field is where you can specify dependencies for your mod. Every Palworld mod must depend on unreal_shimloader.
If you wanna depend on another mod, you can find it's dependency string on the mod page for that mod.
Example
Now that we know the format, let's try and pack a mod to see how it's done in practice.
Our mod will only include a single .lua and a .pak file, and will be named HelloWorld.
First of all, let's create a folder where we will be packing our mod, inside of it, create 2 folders: mod and pak.
Inside of the mod folder, create a folder called scripts
Put your main.lua file which you wrote for your mod into the mod/scripts folder, for an example on how to write lua mods, you could look into the Lua Modding guide.
And put your ModName.pak file into the pak folder.
While we're at it, let's create a manifest.json file in the root folder, after all manipulations the folder should look like this:

Now open the manifest.json, and paste this text into it:
{
    "name": "HelloWorld",
    "version_number": "1.0.0",
    "description": "Hello palworld!",
    "website_url": "https://github.com/thunderstore-io",
    "dependencies": [
        "Thunderstore-unreal_shimloader-1.0.2"
    ]
}
For the icon of our mod, let's use this file, download it, and paste it into your mod packing directory.
Mods are required to have an icon, and it should be 256x256 in size.
Now we also need our mod to have a readme file, so create a README.md file in your packing directory and put this into there:
# Hello World

Hiii!!
Last but not least, create an empty enabled.txt file inside of the mod directory, this is required for your mod to work.
If your mod doesn't contain the enabled.txt file, it will not load.
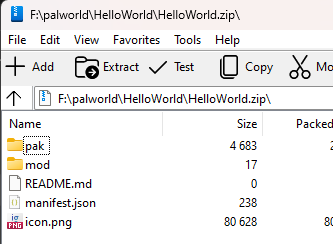
With that done, zip up your mod using your favorite archiver, contents of the zip file should look like so:
Testing
Let's test our example, fire up r2modman or Thunderstore mod manager, select Palworld. Select your profile, or use the default one, go to Settings, search for Import local mod, click that option, and select your zip.
After importing the mod, you should see it in your mod manager:
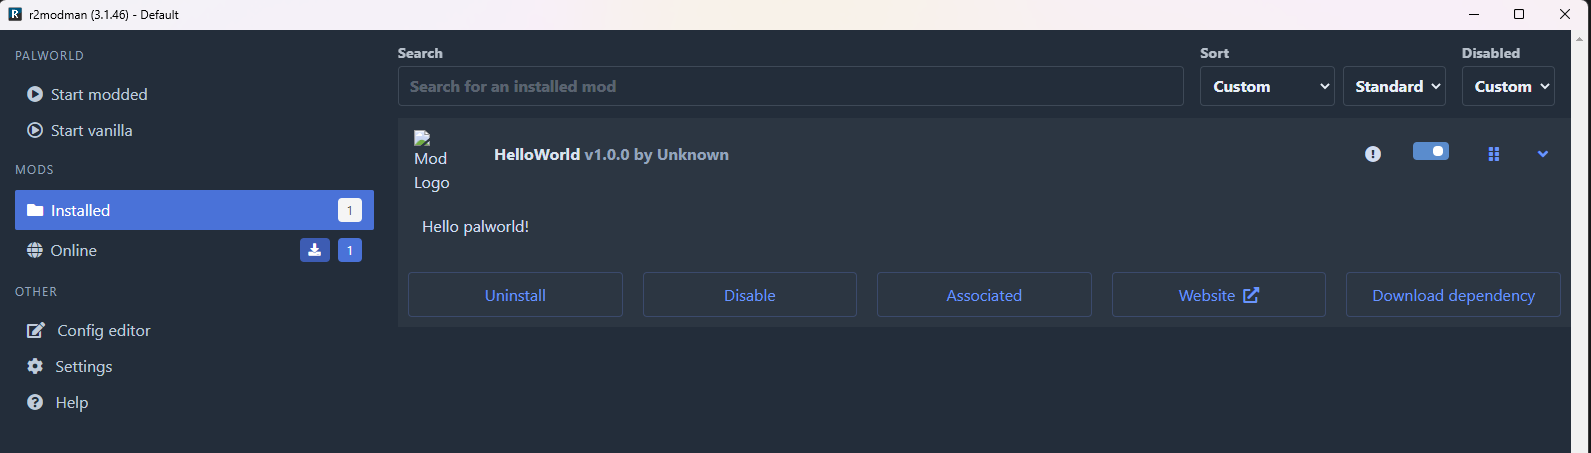
However before starting the mod we must download the shimloader dependency, just click on the Download Dependency button and r2modman should install the shimloader automatically.
If you don't download the shimloader dependency, your mod won't load
Your mod list should look like this now:

Now press the Start Modded button and see if your mod works!