Using Blueprints with Lua
When writing a Lua mod, you can call a method inside a ModActor blueprint. This is useful, as your Lua mod can hook into functions that aren't exposed via Blueprints, then you can create most of your mod's functionality within Blueprints. If you haven't yet, follow the steps to make a basic Blueprint mod in the Creating A Blueprint Mod section, and then come back to this section.
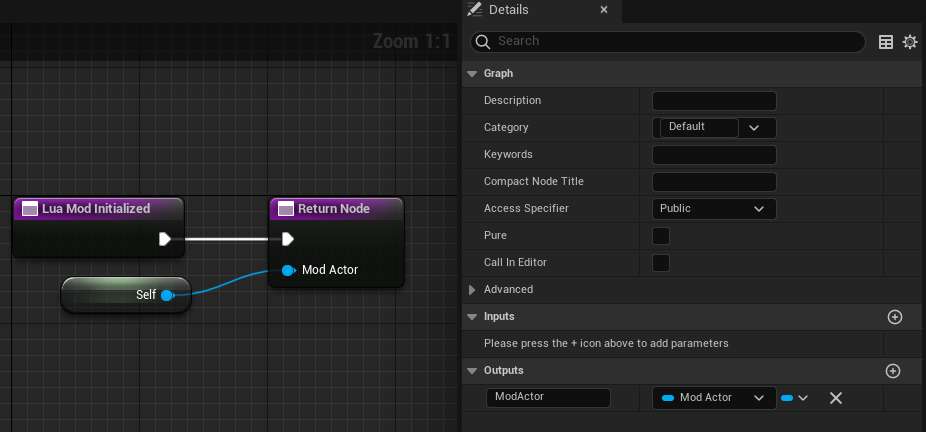
First, we have to let our Lua mod know that the Blueprints mod is active. We'll do this by creating a Lua_ModInitialized function in our blueprint like so:

This function will return your ModActor as a parameter to your Lua mod. Your Lua mod will then use your ModActor to call the functions inside of it. After making this Lua_ModInitialized function, we'll need to set an output parameter which will include our ModActor blueprint. This is what gets sent to our Lua mod so we can cache it and call our other functions found inside the blueprint.
When creating events in blueprints for use with Lua mods, make sure the event name is unique. Currently, RegisterCustomEvent only allows one hook per event name; otherwise, any previous hook with the same name will get overwritten and won't be called at all. This also means that multiple Lua mods can't hook to the same blueprint event, for example, in case the blueprint mod in question is a library. This may change in the future, but for now this is the implementation.
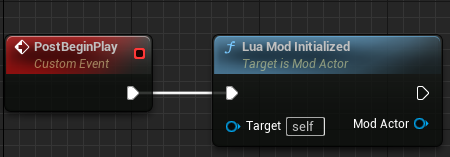
Your function should look like this:
If you have multiple ModActor blueprints in the dropdown
This can be avoided by creating another Actor blueprint within your mod's folder and letting that blueprint handle all of the logic instead. By doing this, ModActor is only responsible for spawning the "core" Actor blueprint, and you'll have an easier time since you can reference that 'core' Actor instead.
As an example, assuming we have a mod called MyFirstMod, we'll create a new BP_FirstModCore Actor blueprint in the folder next to ModActor:

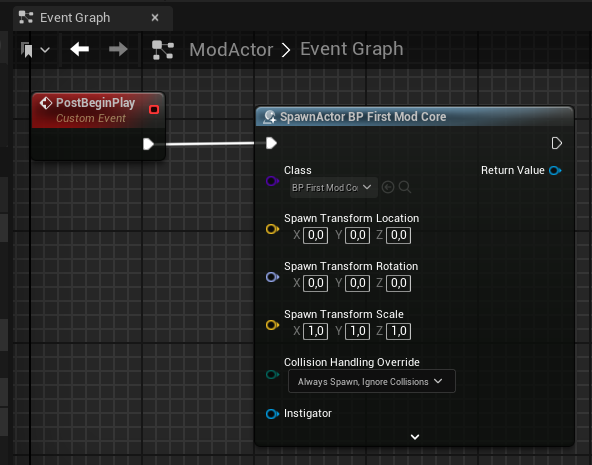
After that, we'll spawn a new BP_FirstModCore actor from inside ModActor:
Lastly, we'll handle the logic from inside the BP_FirstModCore blueprint and continue the tutorial from there:
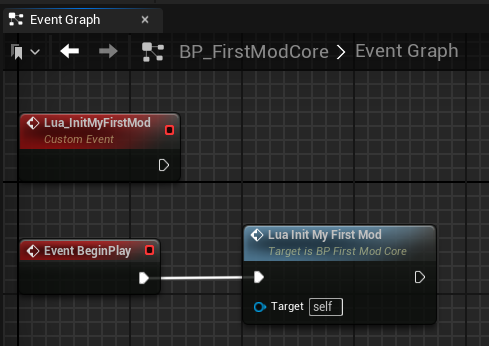
Now we'll connect the PostBeginPlay event to this function. As mentioned in the Setting Up A Basic Mod section, PreBeginPlay is called too early to initialize our mod, so we'll use PostBeginPlay instead.
Next, let's create a new main.lua file and set up our mod. We'll explain our new main.lua script step-by-step:
local _ModActor = nil
Here, we're initializing our Lua mod's ModActor variable to nil. We'll be checking this variable to see if our mod has been initialized or not. This will ensure that our hooks are bound to our events only once; otherwise, you may notice that your mod will bind to events multiple times which is not what we want.
RegisterCustomEvent("Lua_ModInitialized", function (ModActor)
    if ModActor:get() ~= nil and ModActor:get():IsValid() then
        _ModActor = ModActor:get()
        print("Blueprint Loaded!\n")
    end
We use RegisterCustomEvent instead of RegisterHook here since we're waiting on our Lua_ModInitialized function to be called. When the function is called, our Lua mod catches it, and then checks if our local _ModActor is nil. ModActor:get():IsValid() calls the Unreal Engine IsValid() method to ensure that the blueprint is valid before setting our _ModActor variable to our passed-in ModActor. Then, we print to the console so we can confirm that our ModActor blueprint has not only been successfully validated, but also cached and ready to use within our Lua mod.
Now, let's initialize our Lua mod. It has been recommended to register our hooks through the PalHUDService as it is considered performant even for lower-end PCs:
ExecuteAsync(function ()
    local HUDService = FindFirstOf("PalHUDService")

    if HUDService ~= nil and HUDService:IsValid() then
        RegisterHooks()
        return
    end

    NotifyOnNewObject("/Script/Pal.PalHUDService", function (Context)
        RegisterHooks()
    end)
end)
Here, the script attempts to find the first active PalHUDService component in the scene and sets it to our HUDService variable. If HUDService is not nil and HUDService is valid, then we call the RegisterHooks() function. Let's write that function now.
Our RegisterHooks() function is where we'll register our hooks. For our example, we'll create a hook similar to the one we made in the Intro to Hooking Functions section where we hooked into an Otomo being activated:
local function RegisterHooks()
    RegisterHook("/Game/Pal/Blueprint/Component/OtomoHolder/BP_OtomoPalHolderComponent.BP_OtomoPalHolderComponent_C:ActivateOtomo",
    function (Context, SlotID)
        print("LUA: Activating otomo: " .. SlotID:get())
        local HolderComponent = Context:get()
        _ModActor:PrintPalNameFromHolder(HolderComponent)
    end)
end
When activating a pal (or technically, our "otomo"), we'll print a message from our Lua mod to confirm that the Lua mod registered our hook correctly. Next, we'll call a function in our ModActor Blueprints mod by name, and for the purposes of this example, pass in the HolderComponent variable.
Your completed Lua mod should look like this:
local _ModActor = nil

local function RegisterHooks()
    RegisterHook("/Game/Pal/Blueprint/Component/OtomoHolder/BP_OtomoPalHolderComponent.BP_OtomoPalHolderComponent_C:ActivateOtomo",
    function (Context, SlotID)
        print("LUA: Activating otomo: " .. SlotID:get())
        local HolderComponent = Context:get()
        _ModActor:PrintPalNameFromHolder(HolderComponent)
    end)
end

RegisterCustomEvent("Lua_ModInitialized", function (ModActor)
    if ModActor:get() ~= nil and ModActor:get():IsValid() then
        _ModActor = ModActor:get()
        print("Blueprint Loaded!\n")
    end
end)

ExecuteAsync(function ()
    local HUDService = FindFirstOf("PalHUDService")

    if HUDService ~= nil and HUDService:IsValid() then
        RegisterHooks()
        return
    end

    NotifyOnNewObject("/Script/Pal.PalHUDService", function (Context)
        RegisterHooks()
    end)
end)
Now that our Lua mod is set up and we're calling the function by name from our Lua mod, let's create that function in our blueprint.
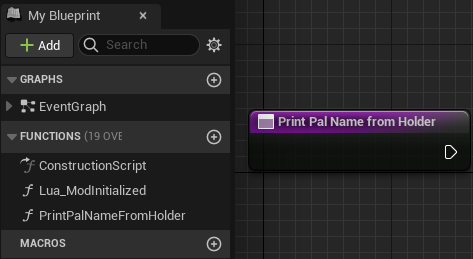
After creating the function, we should create a new input for the function which will match the function we're trying to call from our Lua mod. You may have noticed that in our Lua mod, we have a local variable called HolderComponent which we assign as Context:get(). If you followed the UE4SS section, you'll remember that Context is the UObject that called the function. Therefore, when we pass our HolderComponent variable to our ModActor:PrintPalNameFromHolder(HolderComponent), we are passing the BP_OtomoPalHolderComponent_C component to our method.
With that said, create a new input for our function, give the variable a name, and then set the input type to "Pal Otomo Holder Component Base".

Now when we call ModActor:PrintPalNameFromHolder(HolderComponent) from our Lua mod, we can use the Pal Otomo Holder Component and do whatever we want with it within our Blueprints mod. For the sake of this example, we'll get the currently selected pal from the Pal Otomo Holder Component and then print the pal's name to the mod loader.
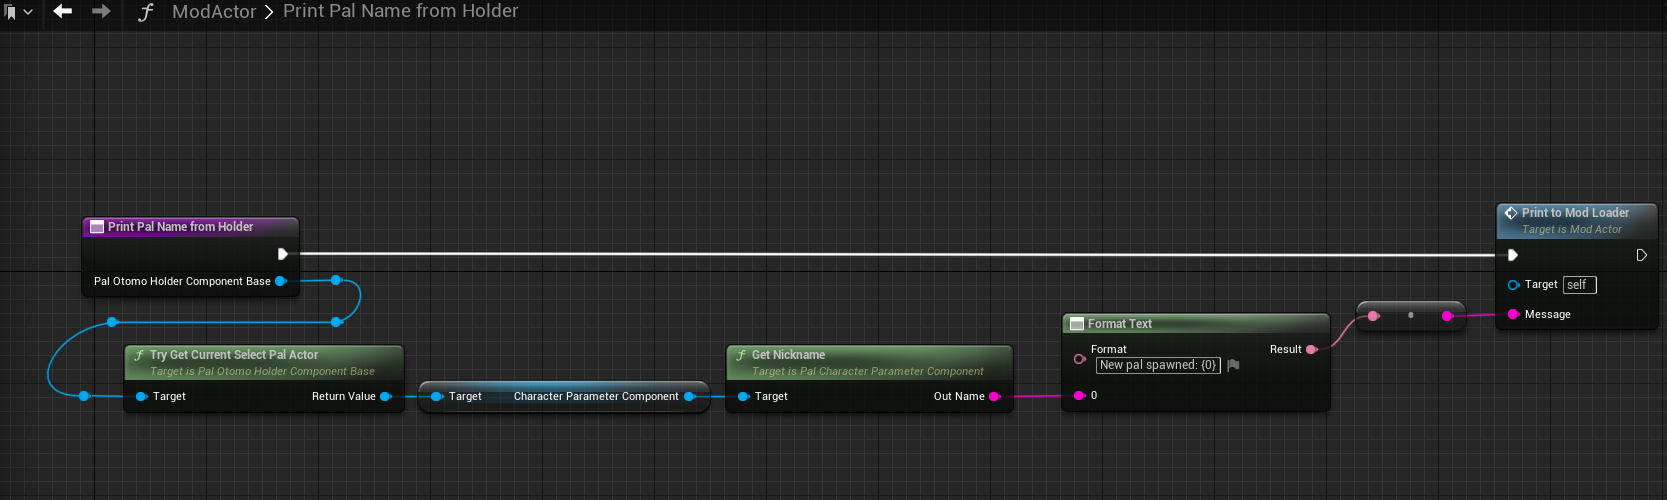
As you can see from the image above, we take the PalOtomoHolderComponentBase that's passed in, use the TryGetCurrentSelectPalActor function to get the currently selected Pal's CharacterParameterComponent, then use the GetNickname function to get that Pal's nickname. We use the FormatText method to create a readable string that takes the Pal's name as an input, then convert the formatted text to a string before printing our new string to the mod loader with PrintToModLoader.
After that's done, you're ready to test your new mod. Assuming your Lua mod is set up correctly in the game's installation folder, follow the steps in the Exporting The Project section to export your mod's .pak file, copy the .pak file into the LogicMods folder located in Palworld/Pal/Content/Paks, then start the game.
If you don't have a LogicMods folder in your Paks folder yet, you can create it yourself.
If everything is correct, you should see your Lua mod's message print in the mod loader when you start the game. Try sending out one of your pals, and you'll see your pal's name printed to the mod loader from your Blueprints mod.
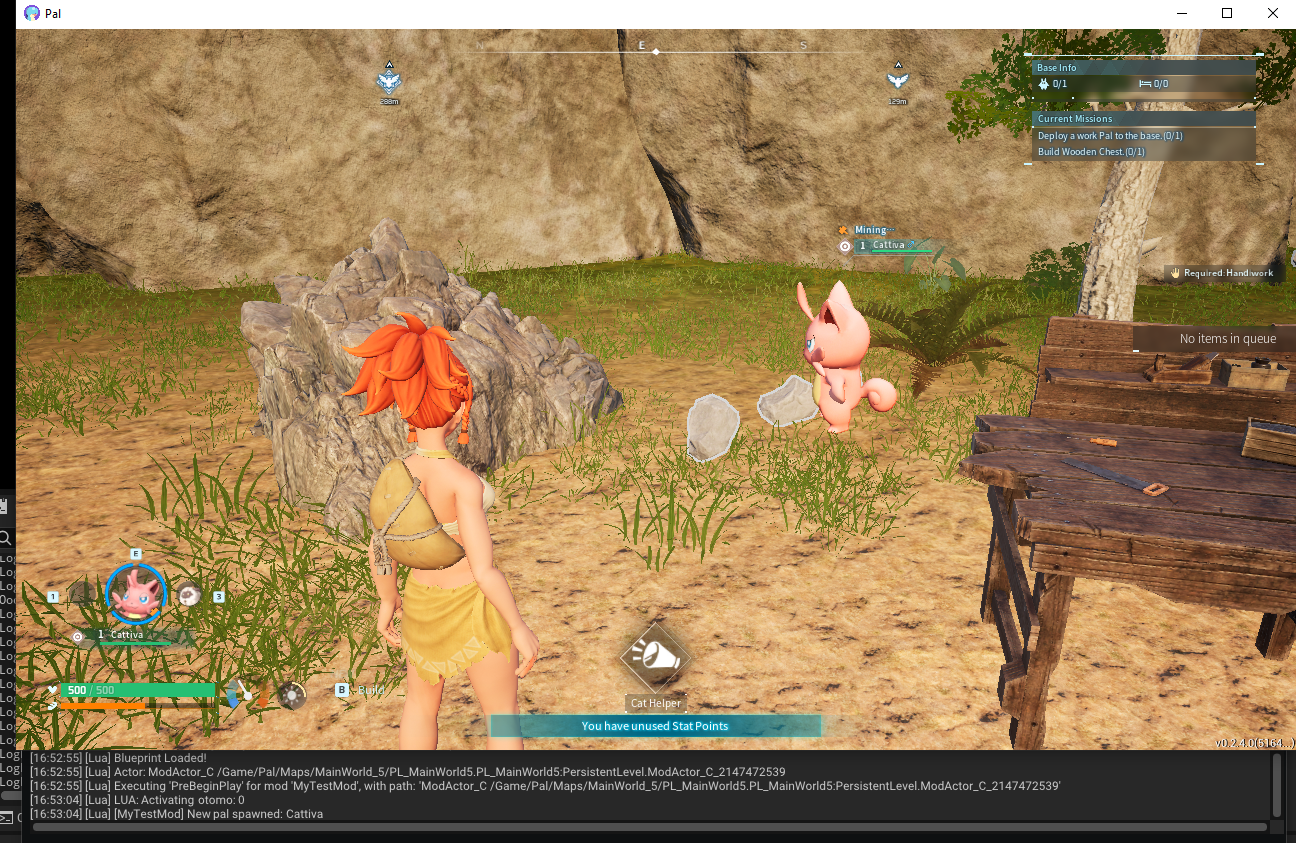
Success! You can see that when printing to the mod loader from our blueprint, our message is prefixed with [MyTestMod], which is the name of the mod we gave it when we created the mod.
Now you can use Lua and Blueprints together to create mods, achieving the best of both worlds in the process. Happy modding!